Photography

sarah lane {studio twelve} senior workshop

I have been lucky enough to learn from a LOT of amazing photographers like Heidi Hope, Jean Smith, Spanki Mills, Courtney Dailey, Leah Remillet, and Kelli France. This workshop with Sarah Lane (owner of Studio Twelve) was nothing less than wonderful. It was enlightening and reassuring to know that I am doing what I love. She walked me through some things I struggle with and we ended the day with a shoot with 6 Napa Valley high school seniors from her Class of 2016 Model Team.  

Complimentary Colors~ Guest Blogger Meredith Ryncarz

I am so excited to have the amazing Meredith, with Memories by Mere, guest blog for me.  I always try to educate my clients on how to make sure they don't mush into be background... but now you get to hear it from someone else!  (YAY!)  ;)  Without further adieu... Meredith:

I often have clients ask me what they should wear for their photography session.  While the quickest and easiest answer is to send them a “what to wear guide”, you may still be shooting yourself in the foot.  For example, if I was photographing a senior session in a meadow and really wanted her to stand out, a green dress or top would blend in while an outfit with a pop of red would make the image more visually interesting.  This is due to something called complimentary colors and they can be found opposite each other on the color wheel.  In the case of the photo below, the red vest and pirate headband add visual point of interest to an otherwise very green image.


Pirate1

The three major complimentary color groups are green and red, orange and blue, and purple and yellow.  By using this knowledge you can bring visual interest to an otherwise blah picture location.  Let’s face it, while you may not be able to always control what your clients wear, you can control where they stand.


Yorktown Childrens Photographer 14

In the case of this little boy, if I had placed him in front of a green meadow or the blue sky, he would still be cute.  By paying attention to what he is wearing and his eye color, I can plan for a more visually stunning effect.  I noticed an old orange brick wall where we were and had him stand in front of it.  By scouting my location ahead of time, I can map out where and what I want to photograph.


774264_362744633824696_1931090474_o

Whether you photograph children, landscapes, or objects, knowing your complimentary colors can vastly improve the look of your image.  The photograph of this historical home was done at night as I experimented with HDR for the first time.  The yellow stucco of the walls played will with the purple blue of the sky and made the home stand out from its surrounding brown Texas landscape.  For your next photo session why not try implementing this element of art.  It is one widely used in painting, marketing, and other art forms.

Untitled_0240

Meredith Ryncarz holds a M.Ed. in Art and has taught at several universities.  She currently is the owner and principal photographer at Memories by Mere Photography.  When she isn’t busy snapping photos or mentoring, she can be found chasing after her two crazy kids and trying out new foods with her foodie husband.


Make Up Night!

A few weeks ago I had a make up night at my house!  I had my super awesome make up artist come and teach high school girls how to apply make up.  They got to practice on a friend and follow along as Tabetha did one of the girls' make up.  The girls seemed to have a lot of fun… and so did I!  They went home with a beautiful, sparkly eyeshadow attached to one of my business cards… hint hint!  ;)  I think this needs to be an annual party! brunette with scarf shows off pristine make up

Professional make up artist applies make up to a senior girl

Putting make up on friends eyes while sitting on a counter

Sisters putting eye shadow on one another.

Applying make up to a friend in order to learn

Everyone gathered in the kitchen learning about make up application

heavy blush is a veery important part of picture ready make up

Chic Critique Magazine Cheerleader Feature! {Colorado Springs Senior Photographer}

I'm SUPER excited to have been featured in Chic Critique Forum's magazine!  It's so cool to see MY images printed in a real life magazine!!!  Makes me feel like a grown up.  ;)  Because this is so fun for me I am offering a GIVE AWAY!  I will be offering a FREE digital copy of the magazine to one lucky person!  In order to qualify, you must be a fan of Jennifer Wyeth Photography on Facebook as well as follow me on Twitter.  For an extra entry, follow me on Google+ as well!!  (So a total of TWO entries for that!!) Once that's done, you also need to become a fan of Chic Critique on Facebook as well as subscribe to their newsletter.  (This is your THIRD entry!)

Please leave a comment for each "entry".  So, if you did each of the things above be sure to leave THREE comments!  One comment should include your email address so I can email you if you win.  I will pick a lucky winner on April 1st!!  YAY!

Here's the awesome feature!

How to get Cheerleaders to shout out YOUR name

Cheerleading photography article for photography magazine

The Importance of Packaging {Colorado Springs Photographer}

I am a firm believer in spoiling.  Raise your hand if you DON'T like to be spoiled from time to time.  (Those of you with your hands up are lying!  We ALL love it!!)  For this reason I always give my clients a gift of sorts.   I usually ask them to make a wish list.  If they don't have anything on it (meaning they got everything they could ever ask for with the session) I will do a beautiful Christmas Ornament with their favorite senior image in it or something along those lines. I also have beautiful packaging.  I have stickers with my logo on it that I slap all over everything (don't want them to forget you!) as well as boxes and bags for all of their images to go in.  This is nice for a few reasons: 1) Keeps everything safe; and 2) who doesn't love to open a present?!  Even if you know what it is, it's still fun to rip something open when a fun gift is inside!  I mean, I'd be lying if I said I hadn't wrapped my own gifts for Christmas a time or two.  :)  (All us moms are guilty of it!)

The last thing I always make sure I do is to write my clients a thank you card to my client.  Choosing a photographer is just that.  They.  Pick.  You.  Keep them happy and guess what?  They will tell their friends!

The three best feelings as a photographer are:

1.) Knowing that your clients love their images.

2. ) Knowing that they love the prints they have purchased.

3.) Getting a call/shout out on Facebook saying how much they loved an unexpected gift.

gray aqua pink and white packages

gift boxes that hold photographs for clients


Aperture! {Colorado Springs Photographer}

As I mentioned previously (ages and AGES ago), three things are involved in learning how to take pictures with your camera in manual... which in my opinion is the ONLY way to get a picture to look the way you want it to look.  One of those key ingredients is aperture.  Aperture (commonly seen as "f/" or "F Stop") is basically what is in and out of focus.  So, if you like the look of the background being out of focus, you will want to shoot "wipe open" as they say, or in other words, with a low aperture number.  What that will do is help you create an image with the subject in focus and the background out of focus.  You need to make sure you are focusing on the subject, of course.  :) Something else you must remember is that aperture is just one corner of the "triangle".  If you are properly exposed (you have the right amount of light coming into your camera so that your SUBJECT is lit nicely) and you mess with the aperture, it will "pull", so to speak, on one corner of the triangle.  If you change your aperture, you will need to adjust your shutter speed and/or ISO to keep your triangle balanced.

Example of shooting "wide open"
Camera settings: Aperture: f/1.4; Shutter speed: 1/250; ISO: 250

In the picture above my aperture was set at 1.4 (you will often see it like this: f/1.4).  That is as wide open as that particular lens will go.  Aperture is based on the lens, NOT the camera.  (Shutter speed and ISO are dependant on your camera, unlike aperture).  If you look closely, you can tell that I focused on the subject's right eye (my left).  It is clear and crisp.  Because I shot so wide open, even his left eye and ear are slightly out of focus.  You also can't tell what is in the background (which in this case is a good thing :)).  The red arrow is pointing to the arm of the couch that is he sitting on.  You can't even really tell that's what it is.

Shooting wide open is a great thing... as long as you aren't shooting TOO wide open.  People seem to think "the wider, the better".  Not always.  In fact, for me, rarely is wider better.  You have to think of what you want in focus.  I like my entire subject's face in focus.  Both eyes.  Mouth.  Stuff like that.  So, I generally stick around 2.8 or tighter.  I DO like the background out of focus.  Especially if you have nice pretty light back there.  Bokeh is a beautiful thing.

You have to think about pictures you are taking of two or more people as well.  If someone is standing slightly in front of the other person, you need to take that into account when setting your aperture.  If I'm taking family pictures I NEVER shoot wider than 5.6. (Only made that mistake once.)  So, my aperture number will be 5.6 or higher.  You want to make sure that everyone is in focus.  (there are, of course, exceptions.)  I know if I was a client there's no way I would pay big bucks to have a fancy picture of my family if two of my kids were slightly blurry.

My aperture is set at 13.0 in this picture
Camera Settings: Aperture: f/13.0; shutter speed: 1/160; ISO: 4000

Ok, in this picture I focused on the same spot (can you tell he was annoyed that I was taking time away from the Wii?)  The difference in this picture than the previous one is that I changed my aperture to f/13.  That's much tighter therefore much more will be in focus and there is not nearly the amount of light coming into my camera as when I was shooting wide open.  Because I tightened my aperture, I had to adjust my other settings to make sure he was still properly exposed.  I changed my shutter speed slightly but most of the change came from the ISO.  It went from 250 in the first picture to 4000.  BIG change.  But, that's what I had to do to make sure he wasn't nearly black.  You can also tell much better what is in the back ground since I shot tighter (remember, more in focus).  Obviously, both eyes are not in focus.  There's a wadded up purple Tinkerbell blanket just past the arm of the couch.  And who can miss the hubby's drying hoody? (laundry day.)  Big difference from the first picture, right?  In this case, I like the wide open shot better.  :)

At the end of the day, aperture is a powerful tool.  It is so much fun to play with and can completely change the mood of your image.  Play around with it.  You'll be shocked at how much more you'll like your images once you have a better understanding of it.  Good luck and here are some more examples of shooting with a wide versus tight aperture.  Notice the arrows showing you where the big changes are when the aperture is changed.


wood pile in and out of focus

little girl in front of fireplace showing example of aperture

flowers as example of aperture changes

pictures of flowers with a wide or tight aperture

Professional Hair and Make Up {Colorado Springs Senior Photographer}

With my sitting fee comes professional hair and make up. It's hard to find someone you like in both of the categories but once you do, it's amazing.  I've heard placing an ad on Craiglist works.  I just asked around.   I have found some really talented girls just out of Cosmotology School do help me out with hair.  They go to my clients home and use enough product so that, even at the end of the shoot, their hair looks amazing!  For make up, I have settled on the Clinique counter at Dillards Department Store. I think a lot of different places would work but we are a little limited down here in Colorado Springs. Because I use the Clinique counter (FREE!!) I am able to give the girls a $25 gift card to spend while they are there.  That one seems to be a home run every time with the Senior girls!I have been very lucky to work with some naturally beautiful girls. However, the camera eats make up for lunch!  You need to go a little heavy on the make up to really notice it. I have done it both ways, (with/without hair and make up), and let me tell you, I will NEVER go back. I am also one of those photographers that believes that Seniors should look 18... not 25.  They can look 25 in their engagement pictures!  ;)

Check out these "before" and "after" pictures. These girls go from natural beauties to complete knock outs!  (Thank you Facebook-   - and my beautiful seniors- for the "before" images!)

cosmetology student spends time getting dolled up for pictures

mixed race beauty gets her hair and make up done for a photo shoot

Riley did her own hair (since it's short) but went for it with the make up!

Pine Creek teen gets hair and make up done

beautiful senior girl in orange top and playing at the lake

natural beauty made top model

S'mores: Capturing Everyday Moments~ Colorado Springs Children Photographer

little boy with freckles in strong sunlight  

A few weeks ago we decided to break in the backyard fireplace and make some gooey  S'mores.  The kids absolutely loved them!  Who doesn't love a throw back to your childhood, am I right?  I took the opportunity to snap a few pictures with my "real" camera since I all too often just pull my iPhone out of my pocket and use that.  (I blame Instagram!)

I want to make sure that I remember to capture these little moments.  The details of these day to day activities WILL eventually go away.  My kids will grow up.  The cute little dimples are their knuckles will someday get wrinkles.  Comforting the bad dreams in the middle of the night will turn to them rolling over and falling back to sleep on their own.

Because of this, my New Year's Resolution was to pull out the big guns and try to take more pictures of my sweet family; no matter the background; no matter the light.


string of marshmallow coming from little girls mouth

marshmallow on a stick in a backyard fire

messy dirty toddler hand

family roasting smores together in a windy backyard

Location Hunting~ Colorado Springs Photography Tips

As photographers we are always (ALWAYS!) looking for fun places to shoot... places that will inspire us... places that are unique and all our own... places that when people see the images they say, "Where did you take these?!?" Well, look no further!  I'm here to give you a few tips on location hunting and finding those prime spots that will be all yours!

1.  Always be on the prowl.  When you're out and about, watch what you're driving past.  You just may find a hidden jewel you've seen a million times.

2. Don't look for the Taj Mahal.  Some of the best places I have ever discovered have been dinky places on the side of the road.

3. Don't be afraid to ask!  If something is private property give it a try!  It's amazing what people will do for a warm plate of chocolate chip cookies!

4. Look to the Internet.  Often times you can find really amazing places on flickr, Instagram, or even Facebook.

5. Ask fellow photographers to go location hunting with you. Raise your hand if finding an awesome new place makes you pee your pants just a touch.  (Trust me, everyone's hands are high in the air).  Your photog friend may see a vision that you would have otherwise missed!

6. Watch the light. Light can be sneaky!  Always moving around on us!  Sometimes an otherwise boring location turns into a magical photographer's oasis at certain times of day.  There are places I won't shoot at in the evening (you know, during that blessed golden hour?!) because they just don't work with the light the same as they do in the morning.

7. Don't be afraid to move things around.  Break a sweat and drag that tree trunk across a field to where the light is yummy!

Here are some images of a shoot I did a while ago.  My photographer friend and I found this location on the side of a busy road... there was even a bright blue dumpster there!

dead tree in dirt provides beautiful pictures in golden light

woman lays on dead tree after location scouting

textured tree provides beautiful light and location for maternity pictures

pregnant woman in pink laughs and cradles her tummy

location hunting found tree with green leaves in dirt field

maternity picture on tree trunk of beautiful blond looking down

I'm Featured on Chic Critique!~ Colorado Springs Photographer

jennifer wyeth photography is featured on chic critique photography forum I LOVE this photography forum.  It's called Chic Critique Forum.  It was created by a good friend of mine, Kelli France, and I have become really involved in it.  I was super excited when they posted a blog post on location hunting that I wrote.  (It will also be appearing on my blog shortly.)  So, take a second and head over there and check it out.  And if you're a photographer looking for a good forum to learn and grow, that's a pretty good place to hang out!  So many amazing people to learn from!!

Reflectors. A Photographer's Best Friend~ Colorado Springs Children Photographer

Reflectors are UH-MAZING.  Seriously.  I pink puffy heart mine.  It makes a world of difference when you are in a low light situation or backlighting someone and you just want a little more light on their face.  I wanted to get an offical reflector for a long time.  I used a big piece of white foam board that worked fine but it didn't give my images the kick I wanted them to have.  So, I finally took the not-too-pricey (photographically speaking) and took the plunge.  This is the one that I had heard was great.  So, that's what I got.  Honeslty, I don't use the stand a ton because I haven't had to so far, but I'm glad I have it.  I still need to get more comfortable with using it ON the stand.  It takes me a while to get it to point the direction I want it to when I use the stand but I'm fairly confident that it's user eror.  ;)  I also got these little suckers because I live in the Windy City... no... not Chi-town.  The Windy City that doesn't get credit for the name it truely deserves.  Colorado Springs, Colorado.  I would hate for my reflector to fall down and smack someone in the face.  Then I'd have to do extra editing.  ;) I haven't had my reflector forever but from what I have seen for my personal preference, I like the gold side when i'm bouncing ambient lighting because it's still really soft.  But if someone is backlit I like the white side.  It takes that harder light and makes it a little softer and not quite as yellow/gold.  But ask me again in a year and I may sing a different tune.

I know I have used my little model here before but she holds still, she's cooperative, and she is only in school 1/2 day so she's around more.  These pictures are completely straight off my camera.  I haven't done anything to either of them.  The only difference is that in the second one I used a reflector.  The camera settings are the exact same.  They were taken about 30 seconds apart.  In the one with the reflector I put the reflector on my leg (which was propped up on the couch to my right so the reflector had something to lean against) and pointed it towards her.  I could see it in actino and could point it right where I wanted it  to get exactly what I wanted.  I have put arrows on the image that have been greatly affected by the reflector.  The ones that are easy to miss but are super important are her catchlights.  Catchlights are those little bits of light in her eyeballs that breathe life into the picture.  Even her teeth look better!!!

reflector use


I really enjoy having my reflector and encourage anyone who is serious about photography to invest in a good one.  This one works just a touch better than my foam one.  ;)

Capturing the *Real* Smile~ Colorado Springs Candid Photographer

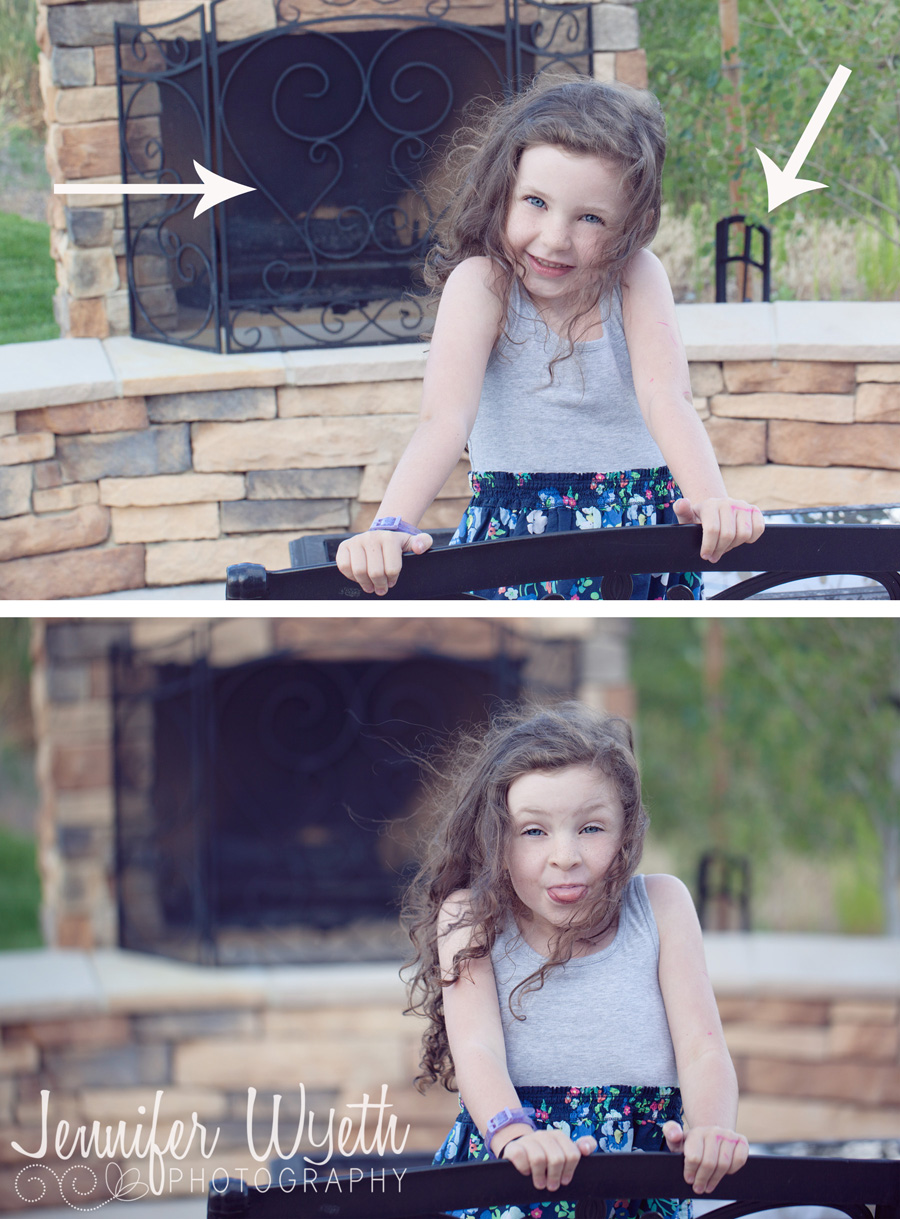
I cannot express how many times I have told my little goofballs to give me a real smile... at which time they proceed to give me their widest, cheesiest, nostriliest grin.  Ugh. It.  Drives.  Me.  Batty.

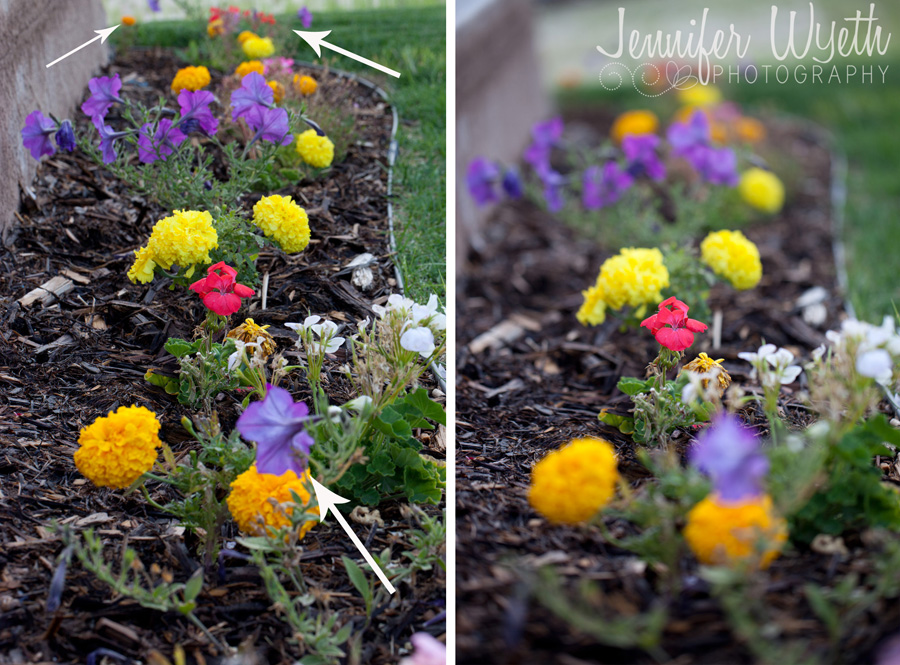
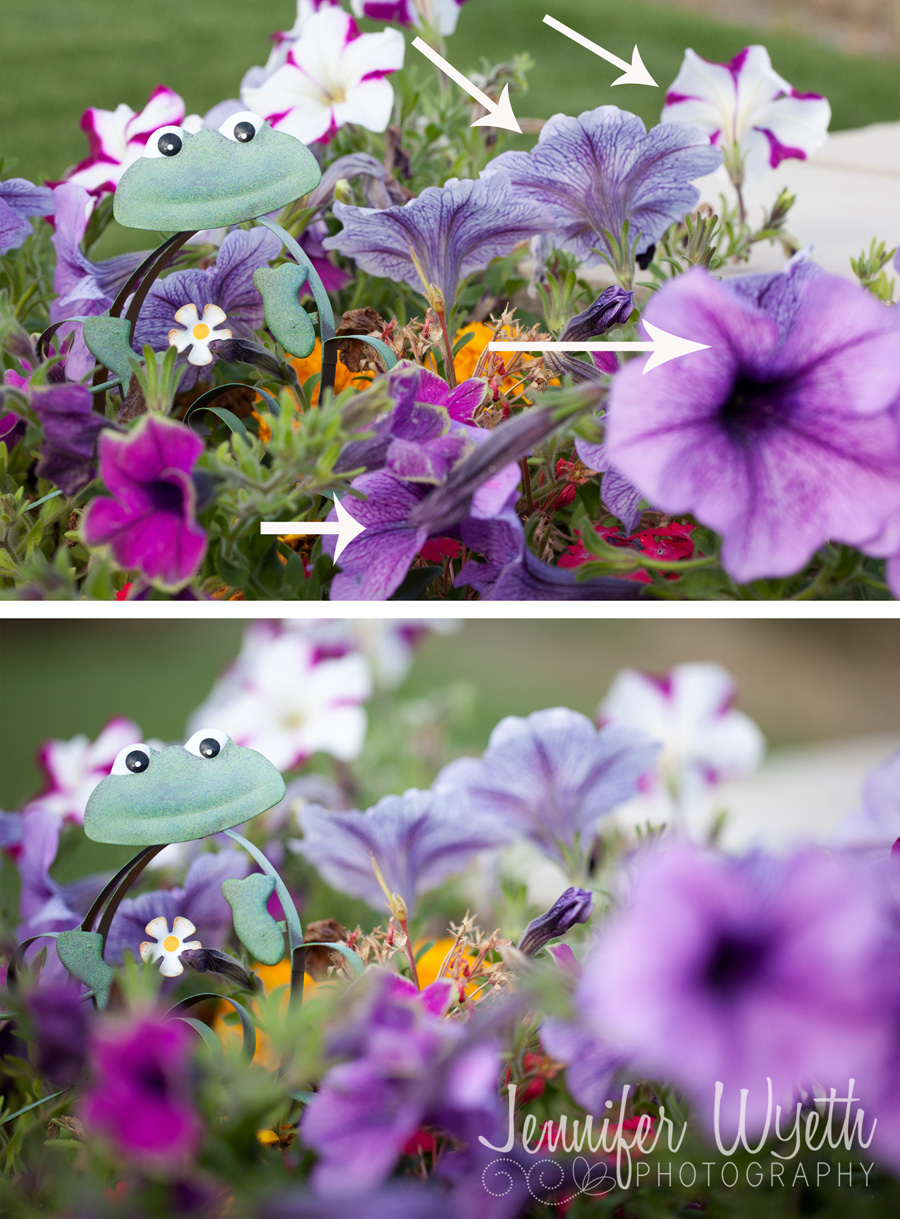
I mean, I don't blame them.  The only thing that is more in their face than my big camera is my iPhone camera.  I can't help it.  What if one moment of their lives goes by and I DON'T get a picture of it?!?  (Right??  Doesn't that sound like a tragedy?)  ;)  I am for sure a lover of candid images.  I love the pictures that show how people are.  The ones that tell a story.  Do I always get them?  No.  But I try to.  I know that every mom out there wants the cookie cutter sit and smile image of their child.  And guess what I have hanging in my house?  Cookie cutter images of my children smiling.  But I also have images that capture a moment in time.  One that I may have allowed to fade if left just to my aging brain to remember.  I love detail shots.  I love shots that people look at and go, "Oh wow!  You can just tell how much they adore each other" even though not every single tooth in the subject's mouth is showing.

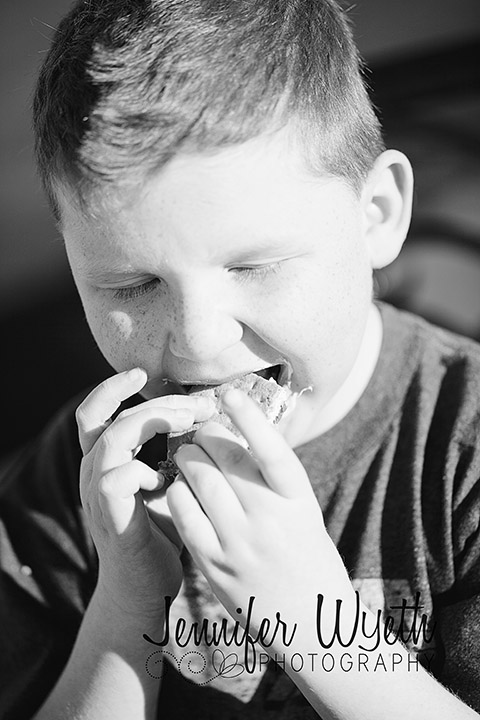
That being said, HOW do you get those image?  How do you get kids, big or small, to get rid of that cheesy grin and show you that sweet, sincere smile they have when they are laughing or when they are listening to ther mom tell them how much they are loved?  THAT smile.  How do you get that?  I have come up with a few ideas that seem to work on kids of all ages.  Not all of these ideas are socially acceptable and I'm sure I've had a mom want to flick me on the nose from time to time... but I think that feeling passes when I show them super killer shots of their kids *real* smile.

fake smiles


I have a few tricks up my sleeve that I use when I'm taking pictures of kiddos, whether they are mine or not.  I have picked them up all over the place: reading articles, friends, other photographers I have gone shooting with, but mostly from being a goofy mom.  Like most other mamas out there, I will do just about ANYTHING to bring a smile to my child's face and hear a giggle escape their little lips.  (Think "Friends" epidose where Ross and Rachel sing "I Like Big Butts" to their newborn just to make her laugh.)

1.  If mom and dad are NOT in the picture have them stand WHERE YOU WANT THE CHILD TO LOOK and be silly.  If you want the child looking at the camera, tell mom to cozy up to the top of your head.  If you want the little one to be looking a little to the right, have Mom and Dad stand there.  Just be sure they aren't blocking your light.  They don't know any better.  ;)

2.  Throw a ball up.  You can get balls that make noises when they bounce, balls with texture, balls that light up, balls that make an annoying noise that kids will undoubtedly think is funny.  With this one you do need to make sure you set ground rules though.  "I'm going to throw this SUPER cool ball but you need to make sure to stay super still or the ball can't leave my hand."  Or something like that.

3.  Have a contest to see who can make the most annoying noise.  Or the loudest laugh.  Or the silliest laugh.   This one, shockingly works really well with adults as well.  Often times when I'm trying to get men to stop giving me a smile that looks like it belongs on nothing short of their drivers license, I will use this one.  Then, of course with the camera ready, I will make a VERY odd sound or obnoxious laugh.  Gets them every time.  The child (or grown man) will relax and laugh because they realize you are a complete idiot.  (In my case they are not incorrect.)

4.  If you have a remote for your camera have your camera set up and do a little dance for the little tyke.  If you don't, make Mom do it.  The goofier the dance the better the laughs.

5.  (This one of one of my top go-to's.)  Make up words to a song they know well.  For example, my kids love and adore Phineas and Ferb.  Whenever I'm trying to get a smile out of them I change the words to something completely and utterly wrong.  Or, my girls love "Princess and the Popstar" (don't ask).   So I will sing that song at top volume in a completely vabrato filled voice.  Or in a super goofy voice.  Even with the correct words you can make them laugh at their favorite song.  You will also get a few different, very snap-worthy, pictures out of this one.

6.  Call then the wrong name.  "Hey Gertrude!"  Or call their family members the wrong name.  Pointing at Dad, "Is that your mom?"

7.  Have them tell you a joke.  Often times my children's jokes make absolutely zero sense.  BUT, they think their own jokes are hilarious.  So, try it.  I bet they have a good one they're dying to share.  And, then, of course, cue your over-the-top laugh.  I also will have a page on my phone pulled up with jokes that I can tell them.  They are always very silly jokes that a three year old will get.  I also ask Mom and Dad to laugh along so that the little one will laugh.  (I will do this with teens that are just a bit uncomfortable in front of the camera as well.  They laugh because it is just so dorky.)

8.  Old Faithful: "Don't Smile!"  Now, with this one you have to know your audience.  I did this a few years ago with my adorable little niece and she promptly burst into tears.  Oops.  I only see her every now and again so I didn't know that she was super sensative.  I felt really, and I mean REALLY, bad.  But, *normally* it works.

9.  With older kids and teens, play the "Who's the cute boy/girl in your class?" card.  Or ask about their boy/girl friend.

10.  Play a (stationary) game (unless you're ready to chase!).  Peek-a-boo is a good one with little kids.  Have them try to scare you, and, obviously act very scared when they holler "BOO!" at you.  If they're fairly small then you can play the "Where's your hair/belly button/ear/ eye" game.  They'd love to show you everything they've learned as soon as they are comfortable with you.  If Mom and Dad are there then they can do something like "Here comes the bee!!"  And then come at them slowly (long enough for them to giggle with anticipation and for you to snap a few pictures).

11.  If mom has brought along their prized posession (a Lightsaber or a puppy they always sleep with) have them show that off.  That will get them to give you a nice sweet smile because they love whatever it is that Mom found worthy of making an appearance in picture.

12. And for the grand finale, make every bathroom noise and say every bathroom word you can think of.  Fart.  Pee.  Poop.  Toot.  All of them.  These ones are ALWAYS winners with little kids.  Moms?  Uhhh... not so much.  But, to me, it's worth it.  I usually throw out a bathroom sound and then say, "Eeew!  Was that your mom?"  Or, "Sick!  Did you HEAR that?!?"  It works.  Promise.

I must say, these tricks are fairly obvious and common but that's because they work.  They are good ones to keep in your back pocket.  Like I mentioned above, make sure you know your audience.  Don't come off too strong right off the bat or they're going to be scared of you.  I'm sure there are a million other ways to get kiddos to shoot you that million dollar grin without it looking canned but these are just the ones that I have found work for ME.

Mondays and an Expodisc~ Colorado Springs Photographer

A while back I invested in something called an Expodisc.  I had heard great things about it and it was relatively inexpensive (as far as photography investments go).  I tried to get use to it, got a little overwhelmed and confused, and ultimately, gave up. Didn't your mom (or someone who knew what they were talking about) ever tell you to NEVER give up?  Well, recently while on Chic Critique Forum, (this is my Glimpses 52 image for the week) someone was talking about their Expodisc.  It put a little bur under my saddle so I'm trying to get the hang of it again.  Potentially, it could save me tons of time!  IF (fat "if") I get use to it and use it all the time my white balance would always be spot on and I wouldn't have to change it in Photoshop.

So, here's my experimenting tonight:

This picture is just having my white balance on Auto (AWB).  If you look at the things that are suppose to be white, it's clear to see that the color is completely off.  (For example, the word "Shield" is white in real life.)

Side note:  We are NOT giving Carter the drug "meth".  He takes a medication called Methotrexate... but occasionally, joking around, we say he's a meth head.  :)

At that point I tried to use the Expodisc.  I had the exposure correct for the meds (or whatever the subject may be), held the Expodisc up against the lens of my camera, and took a picture.  It was mostly black.  I went into my camera settings, changed the white balance to "Custom" and set the custom white balance on that picture that I had just taken that was mostly black.  Then I snapped another picture of the meds.  This is what I got.

Ummm... a swing and a miss.  Wow.  I would say this picture's just a LITTLE green.  :)  Next attempt was to put the Expodisc back on and take another picture (leaving the exposure the same) of the light source.  In this case, that was the Tungsten pendent lights above the meds.  This is what my picture WITH the Expodisc looked like.

This is SUPER green.  I'm sure it's because I had just totally screwed up my custom white balance a second before.  I then set this picture above as my new Custom White Balance setting, and tried once again to take a picture of the meds.  This is what I got.

It's perfect!  This image is straight off the camera.  Nothing has been done to it.  I feel like I can handle the Expodisc indoors... now to conquer handling it in back lit shade lighting...  :)

Next, about the pictures.  Carter is on tons of meds.  (Duh.)  Monday nights are his big night.  He has 2-3 different kinds of medications depending on the Monday night we are dealing with.  He has at least 8 pills (upwards of 10 on occasion).  If he's awake he takes them fine.  If he's sleeping?  Well, that's a different story.  He is SOOOOOOOO  (SO!) hard to wake up.  It takes us several minutes to wake him up.  Often times it involves removing any and all covers, turning on his light, using loud voices, splashing him with water, sitting him up... you name it, we've tried it.  Once we have him sitting we reach for the meds and turn around to find him snuggled up again on his pillow.  So, next time we hold his arm while reaching for the meds and water.  He will take a sip of water and lay back down, assuming he has taken his pills.  We finally recorded it (because he absolutely does NOT believe us in the morning when we tell him how silly he was being) so he could see himself.  He laughed the entire way through it.

He's seriously such a trooper... especially after weeks like this past one.  It was one of the hardest we have had and it's not letting up a whole lot.  He's finally making it through an entire day of school today (an hour and a half to go!).  Something he hasn't done for over a week.  Poor guy.  Two years and one month to go... but who's counting.

What do YOU want for Christmas?

I am a poroud member of the Chic Critique Forum.  (It's a great place to hang out... you should go check it out if you're anything between a  budding photographer and a full blown photographer).  I am also a part of the Chic Critique team (I scout out awesome photogs and convince them to come teach "normal" folk like myself.) :)  I'd love for you all to go check this article out.  There is a DARLING little down syndrome girl who needs a home. So, I'll ask you again... what do YOU want for Christmas?  There's only so many toys Santa can bring your kids, so many Christmas movies you can watch, so many ways you can set up for Santa, but what is more affective in teaching your children about the pure love of Christ than by helping a beautiful baby girl be adopted into a loving, forever family? It's a good cause... what more reason do you need?

Wishful Thinking... Colorado Springs Cancer (?) Photographer

When Carter was diagnosed nearly two weeks ago (seems like it's been SOOO much longer than that but also feels like it was just yesterday) his oncologist asked if I stayed home with the kids.  I told her yes but that I did some photography on the side for fun.  She mentioned a company to me that donates their time (and digital images) to children with cancer.  They do photo shoots of the child with cancer and one or two pictures of the family or the child with the siblings.  I INSTANTLY knew I wanted to be involved.  I have emailed the company and am waiting to hear back.  This is something I would seriously love to take part in.  It's something I would have wanted to be involved in whether Carter had gotten leukemia or not.  I love being involved in charity type of things and providing a service that maybe not everyone can provide and give something to a family in need that may not be able to afford it otherwise.  I like to think of myself as a "pay it forward" kind of person.  (I'm sure I have more than my fair share of "selfish" moments... I should work on that!) So, hopefully at some point when we get Carter into the maintenance phase of his chemotherapy (in 6 months) I can start serving like that.  We'll see if this company accepts me.  If not, then I'll just try to do it on my own.  I'm sure I can give the oncologist my cards and she can pass it along to people who would be interested. 

Aperture

As I mentioned previously, three things are involved in learning how to take pictures with your camera in manual... which in my opinion is the ONLY way to get a picture to look the way you want it to look.  One of those key ingredients is aperture.  Aperture is basically what is in and out of focus.  So, if you like the look of the background being out of focus, you will want to shoot "wipe open" as they say, or in other words, with a low aperture number.  What that will do is help you create an image with the subject in focus and the background out of focus.  You need to make sure you are focusing on the subject, of course.  :) Something else you must remember is that aperture is just one corner of the "triangle".  If you are properly exposed (you have the right amount of light coming into your camera so that your SUBJECT is lit nicely) and you mess with the aperture, it will "pull", so to speak, on one corner of the triangle.  If you change your aperture, you will need to adjust your shutter speed and/or ISO to keep your triangle balanced.

Example of shooting "wide open"

In the picture above my aperture was set at 1.4 (you will often see it like this: f/1.4).  That is as wide open as that particular lens will go.  Aperture is based on the lens, NOT the camera.  (Shutter speed and ISO are dependant on your camera, unlike aperture).  If you look closely, you can tell that I focused on the subject's right eye (my left).  It is clear and crisp.  Because I shot so wide open, even his left eye and ear are slightly out of focus.  You also can't tell what is in the background (which in this case is a good thing :)).  The red arrow is pointing to the arm of the couch that is he sitting on.  You can't even really tell that's what it is.

Shooting wide open is a great thing... as long as you aren't shooting TOO wide open.  People seem to think "the wider, the better".  Not always.  In fact, for me, rarely is wider better.  You have to think of what you want in focus.  I like my entire subject's face in focus.  Both eyes.  Mouth.  Stuff like that.  So, I generally stick around 2.8 or tighter.  I DO like the background out of focus.  Especially if you have nice pretty light back there.  Bokeh is a beautiful thing.

You have to think about pictures you are taking of two or more people as well.  If someone is standing slightly in front of the other person, you need to take that into account when setting your aperture.  If I'm taking family pictures I NEVER shoot wider than 5.6. (Only made that mistake once.)  So, my aperture number will be 5.6 or higher.  You want to make sure that everyone is in focus.  (there are, of course, exceptions.)  I know if I was a client there's no way I would pay big bucks to have a fancy picture of my family if two of my kids were slightly blurry.

My aperture is set at 13.0 in this picture

Ok, in this picture I focused on the same spot (can you tell he was annoyed that I was taking time away from the Wii?)  The difference in this picture than the previous one is that I changed my aperture to f/13.  That's much tighter therefore much more will be in focus and there is not nearly the amount of light coming into my camera as when I was shooting wide open.  Because I tightened my aperture, I had to adjust my other settings to make sure he was still properly exposed.  I changed my shutter speed slightly but most of the change came from the ISO.  It went from 250 in the first picture to 4000.  BIG change.  But, that's what I had to do to make sure he wasn't nearly black.  You can also tell much better what is in the back ground since I shot tighter (remember, more in focus).  Obviously, both eyes are not in focus.  There's a wadded up purple Tinkerbell blanket just past the arm of the couch.  And who can miss the hubby's drying hoody? (laundry day.)  Big difference from the first picture, right?  In this case, I like the wide open shot better.  :)

At the end of the day, aperture is a powerful tool.  It is so much fun to play with and can completely change the mood of your image.  Play around with it.  You'll be shocked at how much more you'll like your images once you have a better understanding of it.  Good luck!

The Photography Triangle

When I first starting getting my feet wet in the world of photography it quickly became apparent that three settings on my camera COMPLETELY controlled the outcome of my image.  There are other things involved (like background, focus... stuff like that) but understanding these three things is absolutely mandatory if you want to have a nicely lit, properly exposed picture.  Shutter speed, ISO, and Aperture are the magic words.  (Those attached articles are by a photographer who I don't know personally but I have a great amount of respect for, both personally and professionally.  Go check them out!) The only way to control these things is to shoot in manual.  So, buck up and go for it!  I started shooting in manual right when I got my first camera.  When the kids would play outside I would sit outside while they ran wildly and take pictures of things that WEREN'T moving... like my feet.  Or a tree.  Or a flower.  When I would get a picture I liked I would try to figure out what I did right.  I finally figured out that if I was properly exposed and then I changed something, like my shutter speed, the light coming into my camera changed.  So, if I changed my shutter speed to catch an action shot, for example, I would have to compensate by changing either my aperture or my ISO.

Over the next few weeks I will be posting how to control each of these three parts of the pgotography triangle and what difference (aside from light) they will make to your picture.  For now, the thing you need to remember is that each of these three things will either let more light in or keep light out depending on how you adjust them.  And light, my friends, is the number one thing you MUST understand to get a true understanding of photography.Aperture, Shutter Speed, and ISO.  Three things that make or break your image.

I'm a Canon Girl~ Colorado Springs Photographer

I pink puffy heart my camera.  People ask my all the time what I shoot with.  I'm Canon through and through.  Got nothing against Nikon or anything else... I just have a little crush on my Canon.  Which Canon, you ask?  Why, it's a Canon 5D Mark II.  And it. is. awesome.  AWE-SOME. When I first got started I bought a Canon 20D.  It was a great camera for me... but I wanted more.  After taking several classes, spending tons of money on equipment, (I'll go into both of those some other time) I finally splurged and got myself my dream camera.  Don't get me wrong, there's still a TON that I want (again, a list for another day) but I am so content with my camera.

One piece of advise I would give to someone who is camera hunting is don't feel like you have to "go big or go home".  I know several amazing photographers who use a Canon Rebel and they take awesome pictures.  Look around on Craigslist if you don't have the funds to get a new one.  (But MAKE SURE you check for certain no-nos.  Email me and I'll tell you what to look out for.)

People have also asked me why Canon.  I don't have a solid answer for that one.  Like I said before, I've got nothing against Nikon.  In fact, one of my very best friends shoots Nikon.  A mentor of mine once told me to "get what your friends have".  It was solid advise.  This way,  I can borrow a lens to see if I like it.  I can call and ask technical questions.  I can ask if they are running into the same issues as I am with one thing or another.  Most of my photography friends shoot Canon so I leaned that way from the beginning and ended up finding a Canon camera to begin with.  Bottom line, though, is that when you are looking to buy a pricey camera with the ability of switching lenses, you can't really go wrong.  Get what feels good when you're holding it.  What works with the size hands you have?  (These suckers are pretty darn big, especially once you have a massive lens on them.)  Ask around.  Ask the people at the camera store what they shoot with and why?  Have they ever shot with another type of camera?  If so, why did they switch?  Then ask another employee what they shoot with and why.  You'll be shocked at how much you can learn from just asking around.  And, don't waste your time going to Best Buy or something like that.  Go to a REAL camera store.  One where all employees are photographers.  You'll make a much more informed decision doing it that way.

All in all, a camera is a great thing to invest in.  It's the gift that keeps on giving.  No matter how many times Bryan rolls his eyes, he loves that I take pictures of the kids.  And so do I.  That's why I got into it to begin with... and I haven't looked back.  It's been a great journey that is FAR from over!

Jennifer Wyeth